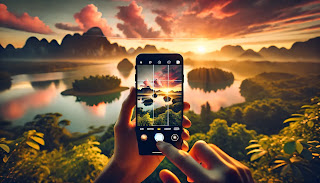
Your iPhone is a versatile tool for photography, equipped with advanced features and settings that can help you capture stunning images. Here’s a detailed guide on how to use these features to enhance your photography skills.
1. Use the Grid Feature
-
How to Enable:
- Go to
Settings>Camera> toggleGridon.
- Go to
-
Effect: The grid divides your screen into nine equal parts using two horizontal and two vertical lines. This helps you compose your shots using the rule of thirds, a fundamental photography principle that suggests placing your subject along these lines or at their intersections to create a balanced and interesting photo.
2. Adjust Exposure Manually
-
How to Adjust:
- Open the Camera app.
- Tap on the screen to focus on your subject.
- Slide your finger up or down next to the focus box to increase or decrease exposure.
-
Effect: Manually adjusting the exposure allows you to control the brightness of your photos. This is particularly useful in challenging lighting conditions where automatic settings may not give you the desired result.
3. Use HDR Mode
-
How to Enable:
- Open the Camera app.
- Tap
HDRand selectAutoorOn.
-
Effect: HDR (High Dynamic Range) mode captures three photos at different exposure levels and combines them to create a single image with better detail in both the shadows and highlights. This is especially useful for high-contrast scenes, such as landscapes or photos with a bright sky.
4. Experiment with Portrait Mode
-
How to Use:
- Open the Camera app.
- Swipe to
Portraitmode.
-
Effect: Portrait mode uses depth-effect software to keep the subject sharp while blurring the background, mimicking the bokeh effect seen in DSLR photography. This mode is ideal for capturing professional-looking portraits.
5. Utilize Burst Mode
-
How to Use:
- Hold down the shutter button or volume button in the Camera app.
-
Effect: Burst mode captures multiple photos in quick succession, which is perfect for action shots, candid moments, or group photos where it's hard to get everyone to smile at the same time. After taking a burst, you can select the best shots from the sequence.
6. Take Advantage of Night Mode
-
How to Use:
- Night mode activates automatically in low-light conditions. You’ll see a yellow moon icon when it’s enabled.
- Hold your phone steady or use a tripod for the best results.
-
Effect: Night mode uses longer exposure times and advanced algorithms to produce brighter and clearer photos in low-light settings. It combines multiple shots taken at different exposure levels to reduce noise and enhance detail.
7. Leverage Live Photos
-
How to Enable:
- Tap the
Live Photosicon (three concentric circles) in the Camera app.
- Tap the
-
Effect: Live Photos capture 1.5 seconds of video before and after you press the shutter button, creating a short animation. This feature can make your photos more dynamic and allows you to choose the best frame as the main photo. You can also apply effects like Loop, Bounce, or Long Exposure to your Live Photos.
8. Use the Timer for Steady Shots
-
How to Set:
- Tap the timer icon in the Camera app and choose a delay (3 or 10 seconds).
-
Effect: Using the timer allows you to avoid camera shake that can occur when you press the shutter button, resulting in sharper photos. This is particularly useful for low-light shots, group photos, or selfies where you need to set the camera down.
9. Try Different Filters and Editing Tools
-
How to Apply Filters:
- Open the Camera app.
- Tap the filter icon (three overlapping circles) and select a filter before taking the photo.
- Alternatively, apply filters after taking the photo in the Photos app by tapping
Editand then the filter icon.
-
Effect: Filters can enhance the mood and style of your photos. Experiment with different filters to see how they affect the colors and contrast. The Photos app also offers powerful editing tools to adjust exposure, contrast, saturation, and other parameters to fine-tune your images.
10. Clean Your Lens Regularly
-
How to Clean:
- Use a microfiber cloth to gently clean the lens. Avoid using abrasive materials that can scratch the lens.
-
Effect: A clean lens ensures that your photos are sharp and free of smudges or dirt that can affect image quality. Cleaning your lens regularly can make a significant difference, especially when shooting in bright light or when taking detailed close-up shots.
Additional Tips for Better iPhone Photography
Use Natural Light Whenever Possible
- Effect: Natural light generally provides the best lighting for photos. Try to shoot during the golden hour (the hour after sunrise and before sunset) for soft, warm lighting.
Use the Volume Buttons as Shutter
- How to Use: You can press the volume buttons on the side of your iPhone or on your EarPods to take a photo. This can help you avoid camera shake and take steadier shots, especially when holding your iPhone in landscape mode.
Explore Third-Party Camera Apps
- Recommendation: Apps like ProCamera, Halide, and Camera+ offer advanced features like manual focus, RAW format shooting, and more precise exposure controls.
Use a Tripod for Stability
- How to Use: Mount your iPhone on a tripod to keep it steady, especially useful for long exposure shots, time-lapse photography, or when using Night mode.
By leveraging these detailed tricks and tips, you can significantly improve your iPhone photography skills, capturing stunning images in any situation. Happy shooting!
